Tutorial
Launching and managing instances

Launching instances
In order to use computing resources a network is necessary to so instances can be addressed and are able to communicate with each other. To create a network procede as follows.
- Log in to heiCLOUD.
- Under Project → Compute, click on Instances. You will see an overview of your (existing) instances.
- In the top right, click on the Launch Instance button. A new window will open with the Details tab. Enter a name for the instance.
- Click on the Source tab. You will see a list of images. Select one by clicking the "+" button next to it.
- For Linux and Windows server 2012:
Select the desired image for the instance. - For Windows server 2016 and newer:
Select the desired Windows server image (e.g. WS2016 heiCLOUD) for the instance. Under Create New Volume, click on Yes and enter a size for the new image. The minimum size is 65 GB. Leave the Device Name vda unchanged. This way, a HDD-Normal type persistent storage volume is automatically created. - (Optional) Custom volume:
Changing the type (e.g. SSD) of the root drive is only possible if you create a volume beforehand. You can find instructions on how to create a volume for use as the root drive under Using a volume as root drive for an instance. In this case, please select Boot source: Volume and specify the volume previously created.
- For Linux and Windows server 2012:
- Under Flavor, select a preconfigured option for allocating resources to the instance (e.g. m1.medium).
- Click on the Network tab. Here, click on the "+" symbol next to a network from the available networks to assign the instance to it.
- Click on the Security Groups tab. Select one or several security groups in which the instance is to be located (e.g. default).
- Finally in the Key Pair tab, select the SSH key you created.
- Click on Launch Instance in the bottom right to start the instance.
- You will see an overview of your instances.
- To assign a public IP address to your newly created instance, click on the arrow button to the right in its row and select the first option, Associate Floating IP. A new window will open.
- Next to the IP Address box, click on the "+" button. A new window will open. The Pool field must say "heiCLOUDExternal". Click on the Allocate IP button. The previous window will appear again. Click on Associate to complete the process.

Releasing floating IPs
Floating IPs that are no longer associated with an instance must be returned to the pool of reservable addresses to stop them incurring any costs. To do so, please proceed as follows:
- Log in to heiCLOUD.
- Under Project → Compute → Access & Security, click on the Floating IPs tab. Here you will find a list of all your reserved floating IPs and the instances they may be associated with.
- Select the addresses you wish to release by clicking the checkboxes left of the IPs. After that click the Release Floating IPs button in the top right. A new window with a confirmation dialog will open.
- Confirm the release of the IP(s) by clicking Release Floating IPs.
Please also note the information displayed in the confirmation dialog. In particular, a released floating IP returns to the pool of all available floating IPs and as such may be reserved and used by another project/user at any point.
Changing the instance size
Changing the instance size, i.e. changing to a larger (or smaller) flavor, is also possible for running instances. Please note that the instance will be temporarily stopped in the process. To change the instance size, please proceed as follows:
- Log in to heiCLOUD.
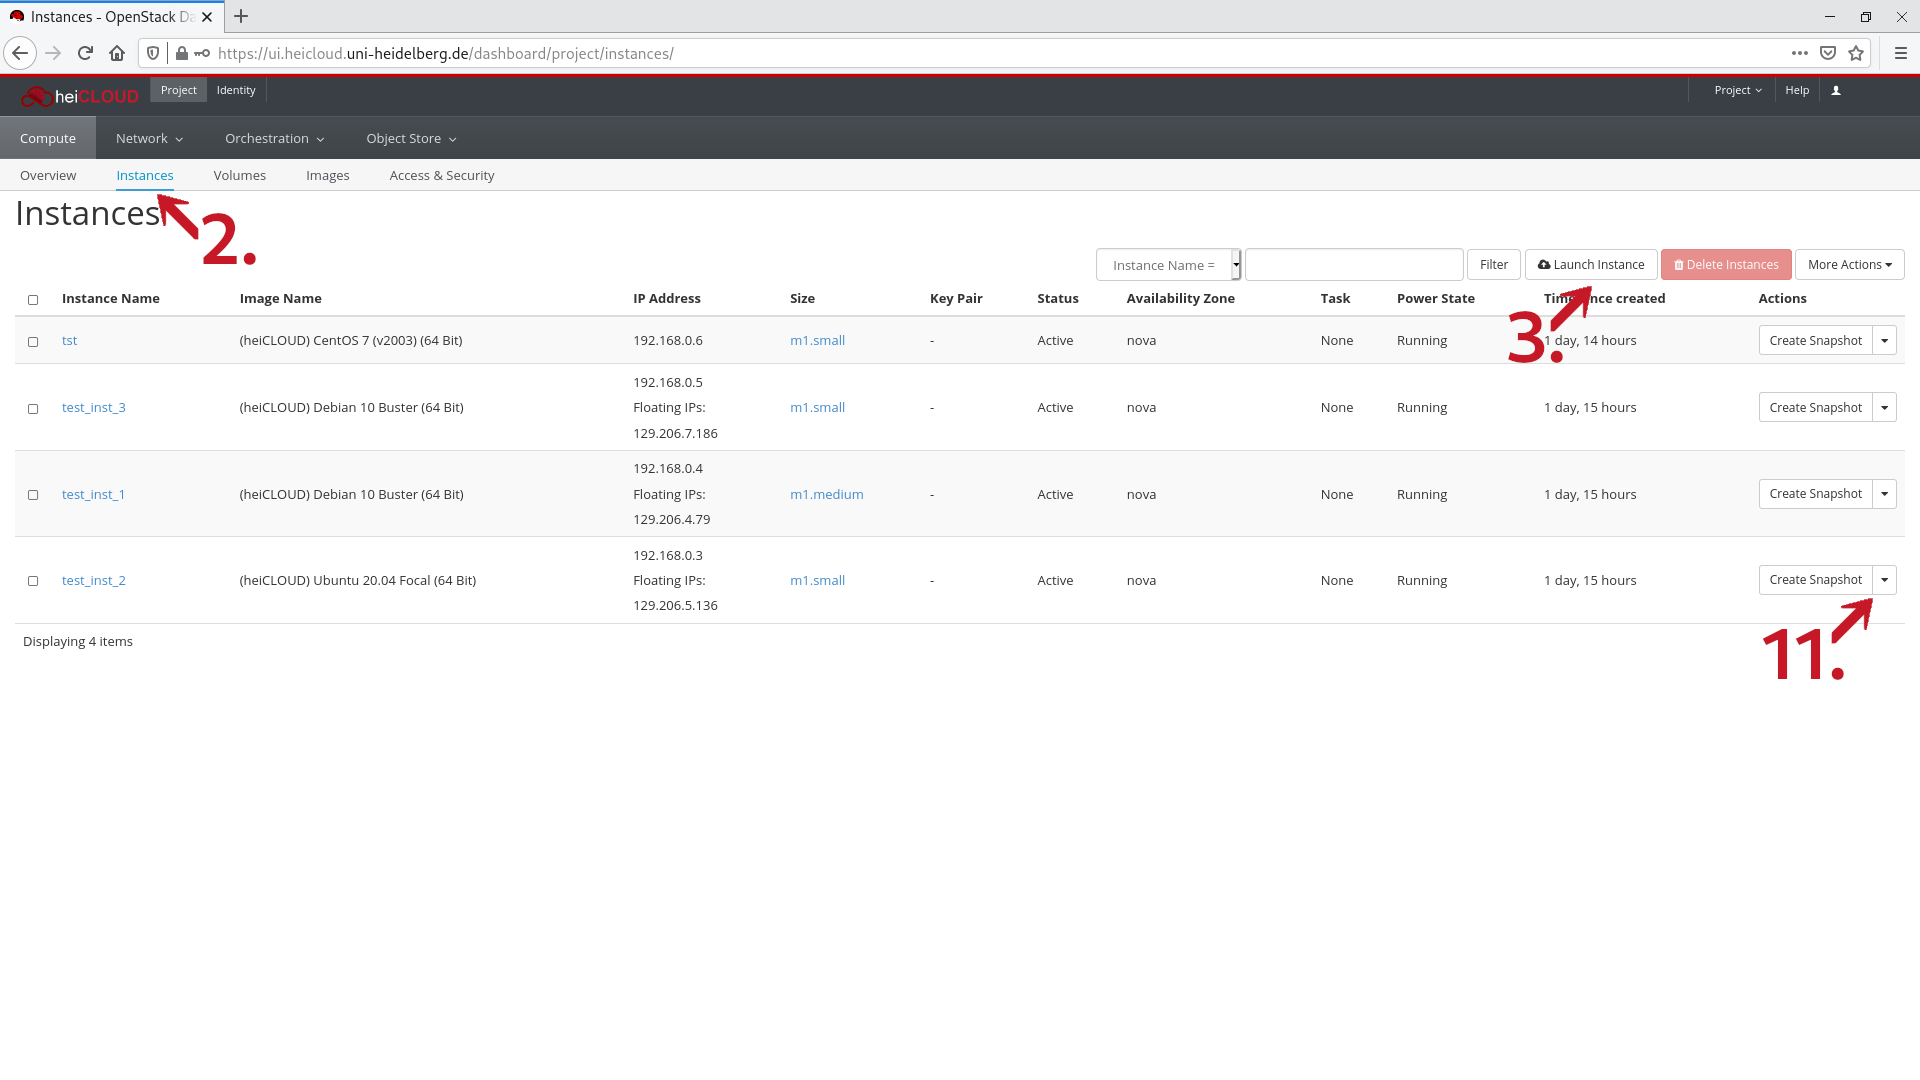
- Under Project → Compute, click on Instances. You will see an overview of your existing instances.
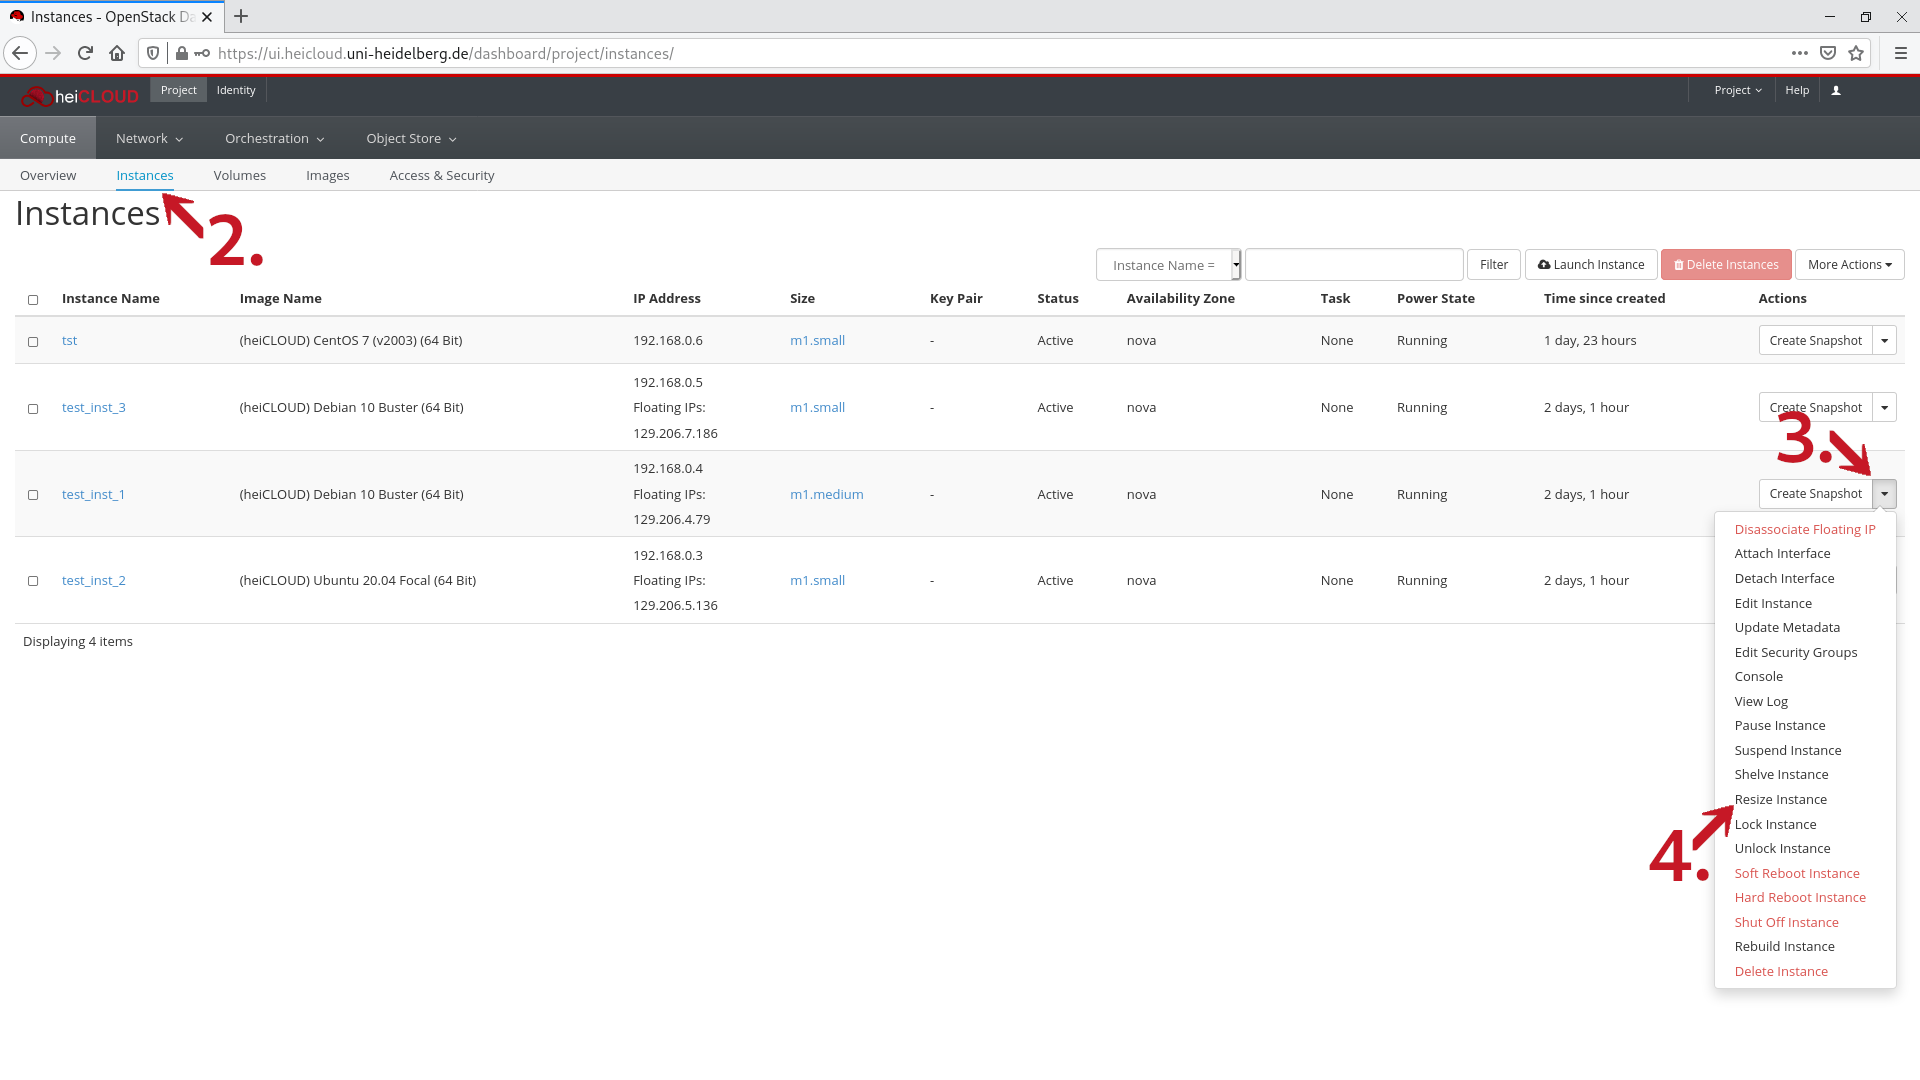
- In the row of the relevant instance in the Actions column, click on the arrow. A new dropdown menu will open.
- Select Resize Instance. A new menu will open.
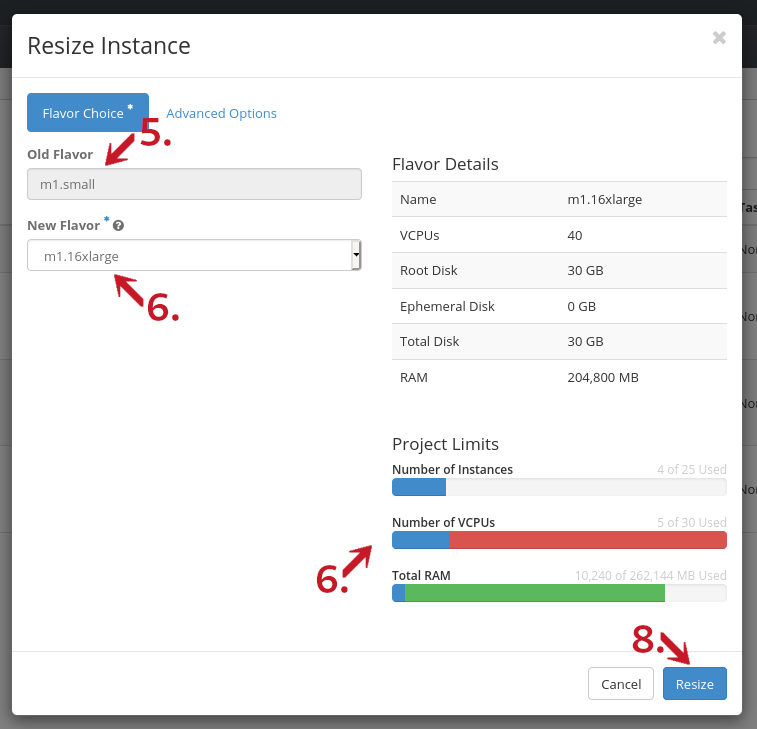
- At the top under Old Flavor, you will see the current flavor/instance type.
- In the New Flavor dropdown menu you can select the new flavor/instance type. To the right you will see the details of the selected flavor, as well as whether your current quota allows an increase (green or yellow) or whether this would exceed your quota (red).
Changing to a smaller flavor (as long as one exists) is, of course, always possible. - Should you require a higher quota, please contact the IT support
- Click the Resize button in the bottom right to complete the process.
The size of the root drive or the volumes that may be attached is not altered by a change in instance type.