Tutorial
Managing data storage
If data needs to persist byeond the lifetime of an instance, storage devices or object storage are necessary. The OpenStack component Cinder is used with Ceph as a storage backend to make block devices available as storage volumes. Your data is replicated three times and stored distributed across multiple storage systems. This creates a higher degree of reliability than traditional RAID systems.
Creating a volume
Volumes are comparable to hotplug SATA or SAS disks which can be added or removed from a VM dynamically at runtime. Unfortunately at the moment a volume can't be shared or mounted on multiple instances.
To create a volume please proceed as follows:
- Log in to heiCLOUD.
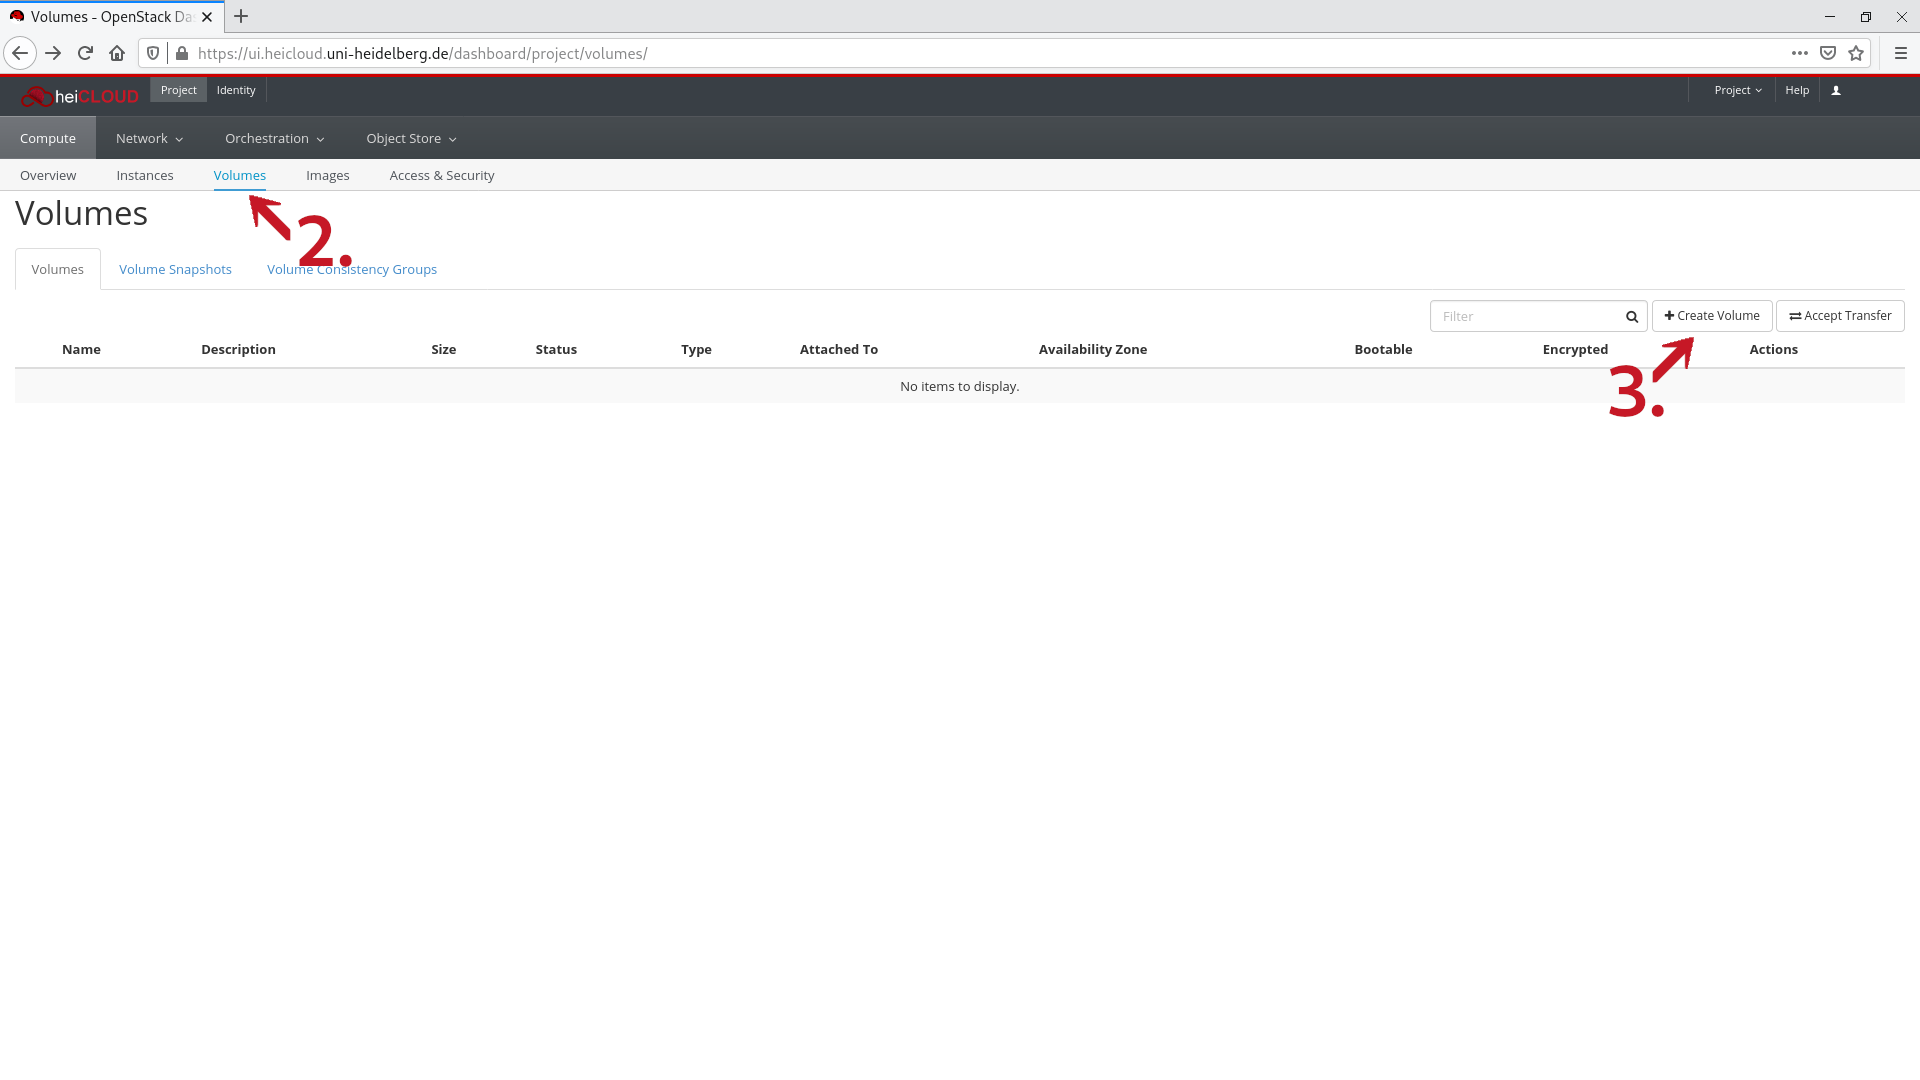
- Under Project → Compute, click on Volumes. You will see an overview of your (existing) volumes.
- In the top right click the Create Volume button. A new window will open.
- Enter a name for the volume.
- In the dropdown menu Volume Source choose the option No source, empty volume.
- The Type menu allows you to choose the type of storage device. You can see a performance description of the chosen type in the Volume Type Description field on the right.
- Enter the desired size of the volume in the Size field.
- Click the Create Volume button. You will see the volume just created in the overview.
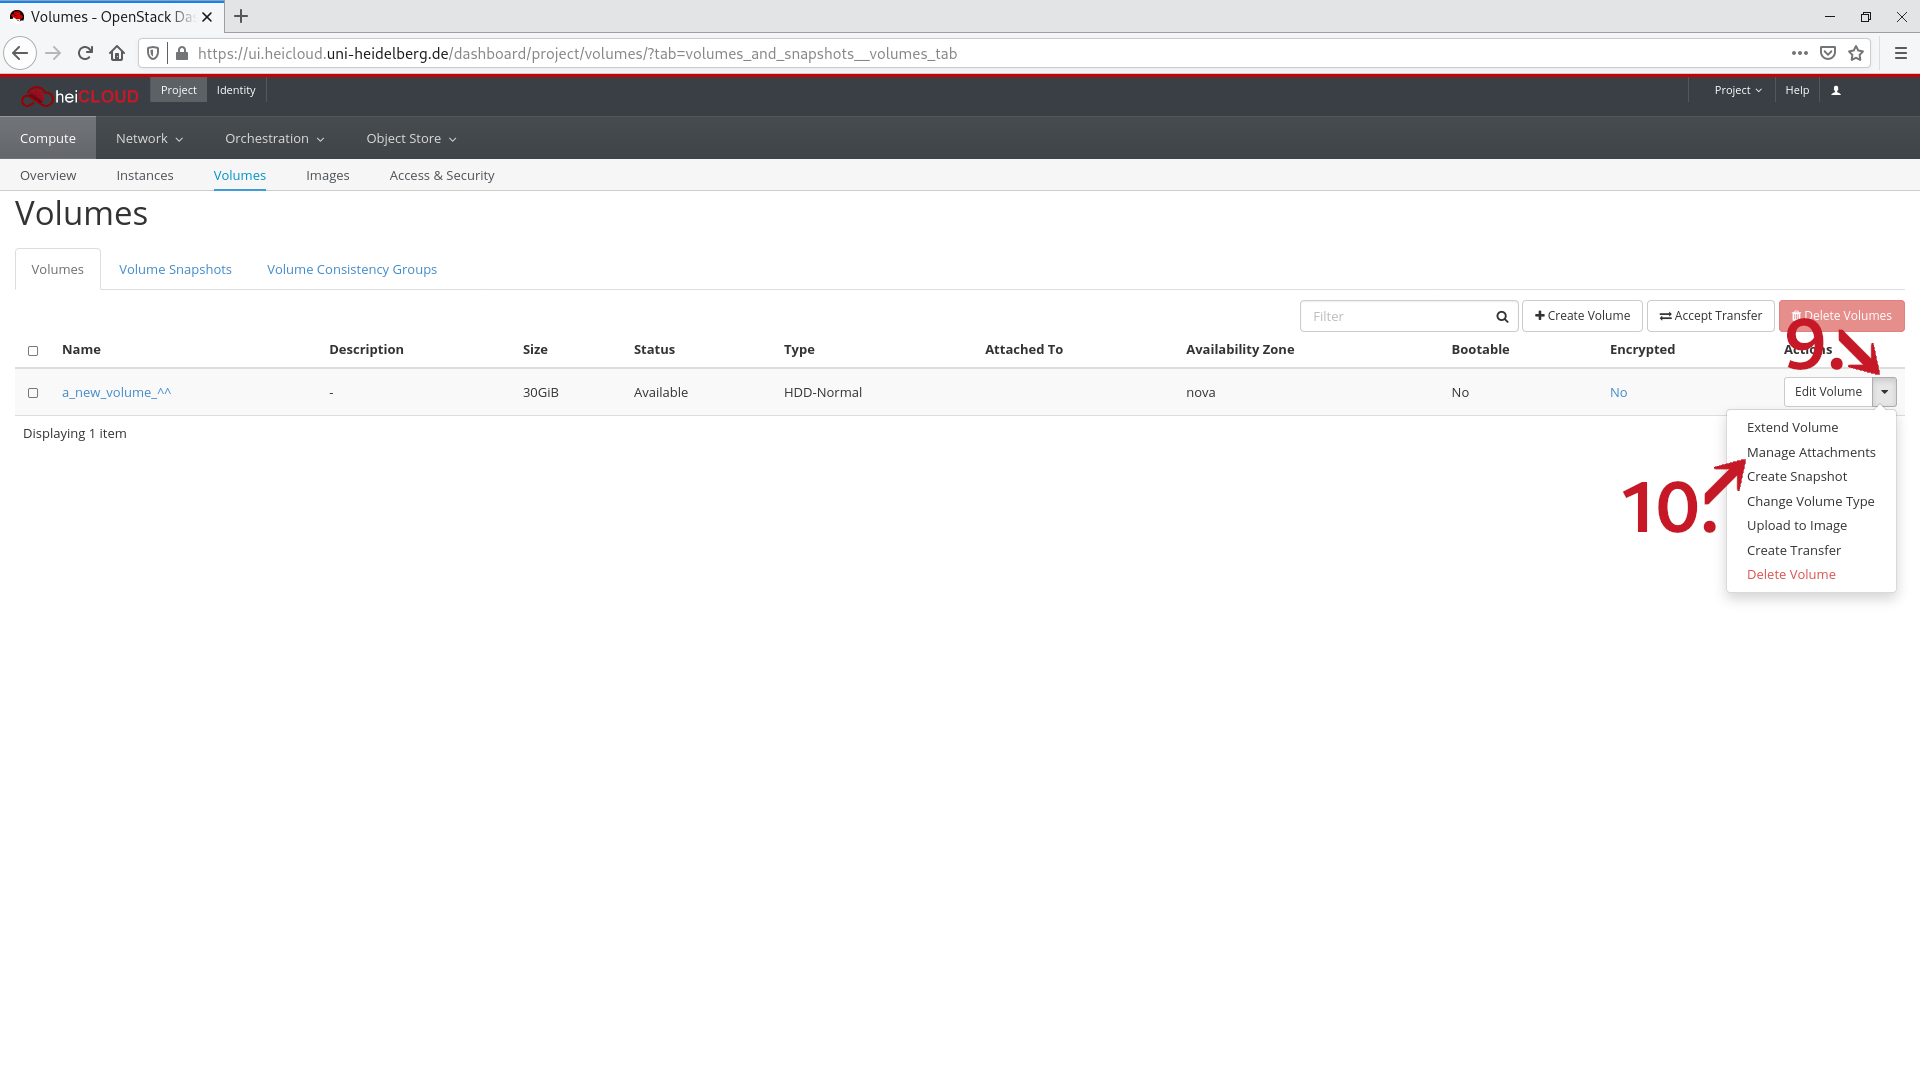
- To attach the new volume to an instance click the arrow button to the right of it. A a dropdown menu will open
- Click the option Manage Attachments. You will see a new window.
- Choose an instance to attach the volume to from the Attach to Instance menu.
- (optional) Enter a device name which the volume will be mounted as into the device field.
- Click the Attach Volume button.
- You can now see the which instance the volume is attached to and under what device name in the Attached To column of the volume overview.
Please note:
It is not possible to disable a volume to avoid costs. Persistent Volumes like the ones created here accrue costs as long as they exist regardless of usage.
Using a volume as root drive for an instance
You can create a persistent volume from an existing image and use it as a boot or root drive for an instance. This way you can use an SSD as an instance's root drive.
Unlike the normal 30 GB of temporary storage which is available to most instances automatically this is a persistent volume which causes additional costs. For most users the following steps are unnecessary.
To create a volume as a root drive proceed as follows:
- Follow steps 1-4 from Creating a volume.
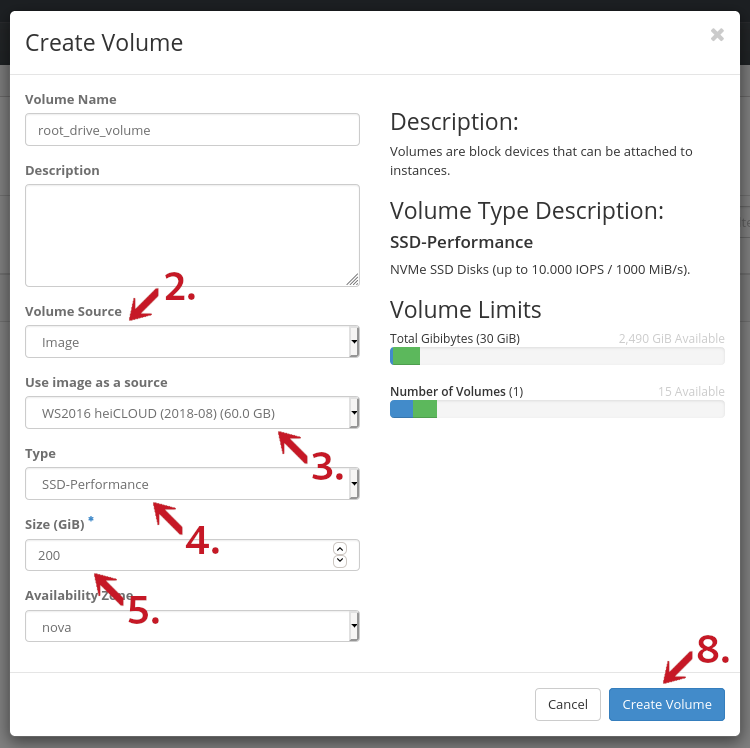
- In the dropdown menu Volume Source choose the option Image.
- In the dropdown menu Use image as a source select the image you want to use (e.g. WS2016 heiCLOUD for Windows Server 2016).
- The Type menu allows you to choose the type of storage device. You can see a performance description of the chosen type in the Volume Type Description field on the right.
- Enter the desired size of the volume in the Size field. The Windows Server 2016 image requires at least 65 GB.
- Click the Create Volume button. You can see the newly created volume in the overview
With that the volume is created and can be mounted on an instance as the root drive as described in steps 9-14 in Creating a volume.
Deleting volumes
- Log in to heiCLOUD.
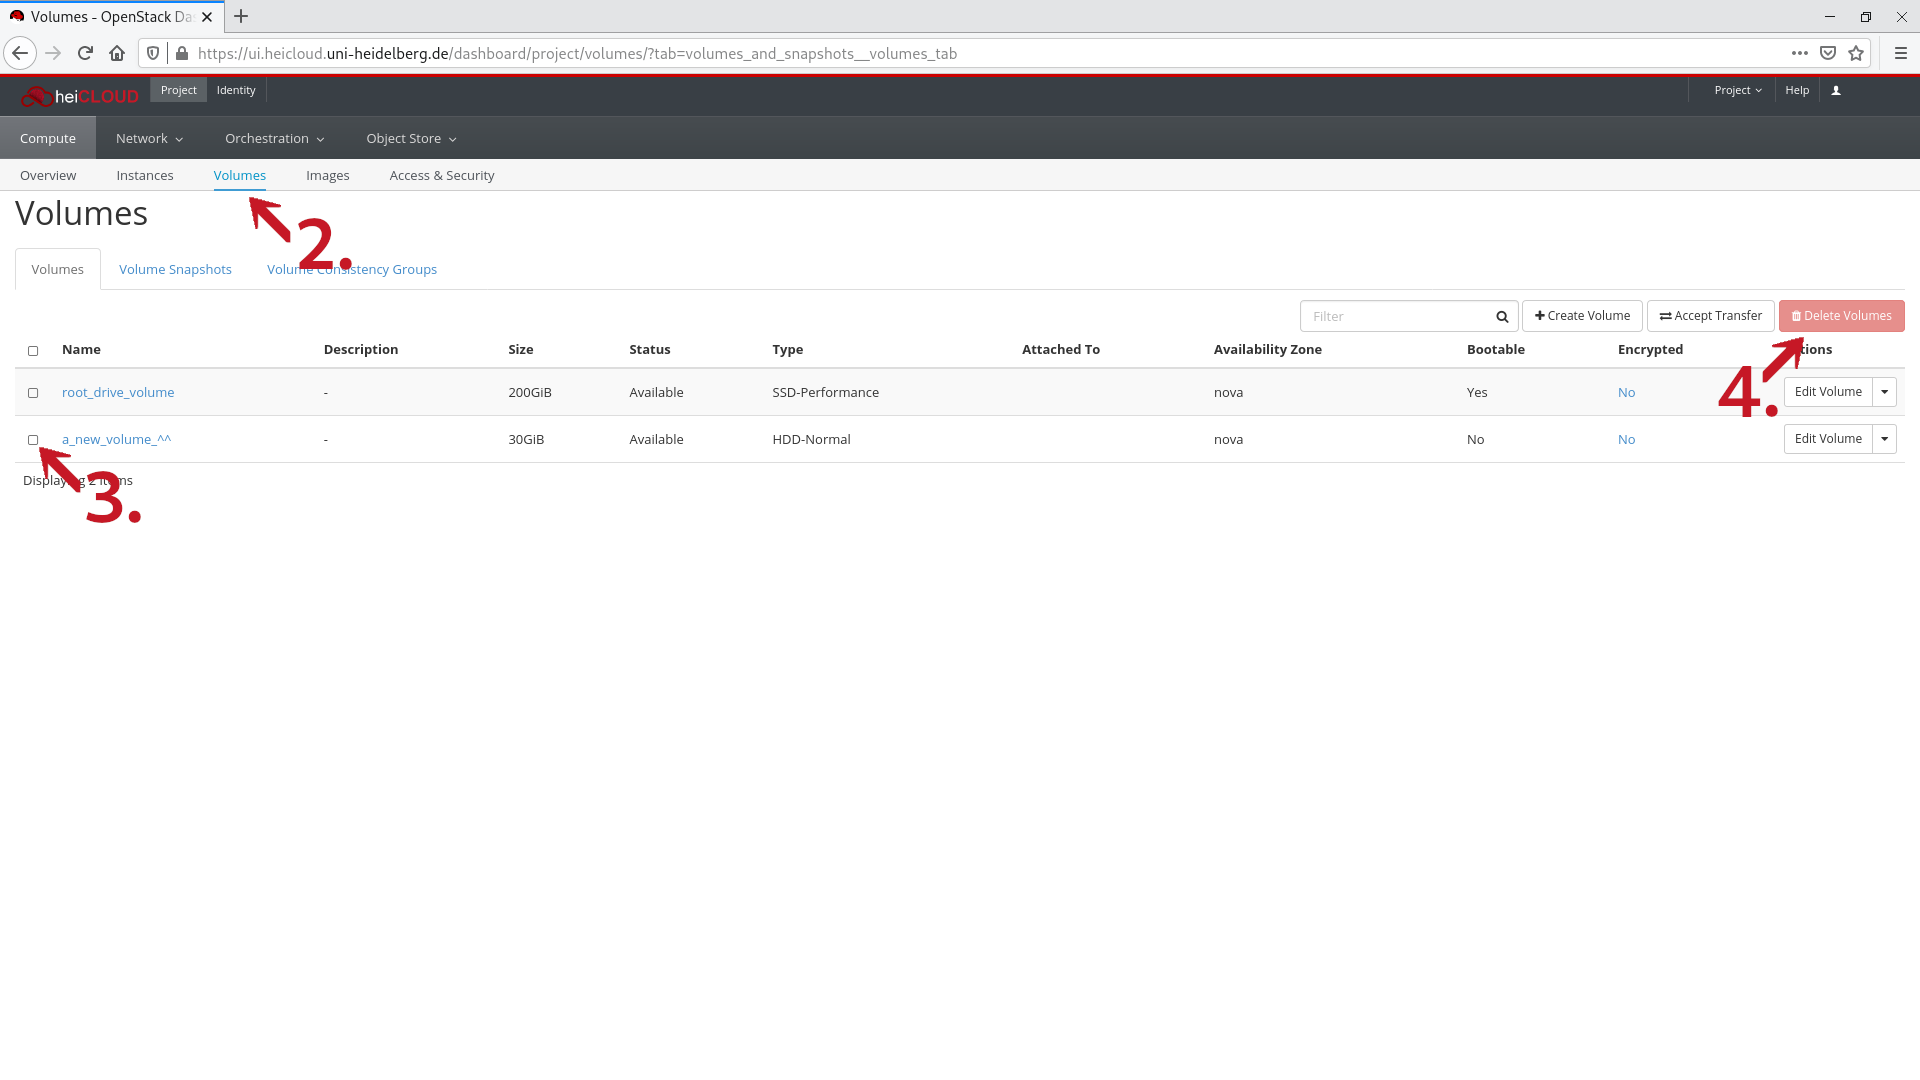
- Under Project → Compute click on Volumes. You will see an overview of your (existing) volumes.
- Select the volumes to be deleted by clicking the checkbox left of their name.
- To delete all selected volumes click the Delete Volumes button in the top right. A new window will open asking for confirmation.
- After checking whether the volumes listed there should really be deleted click Delete Volumes.