Tutorial
Creating networks and routers
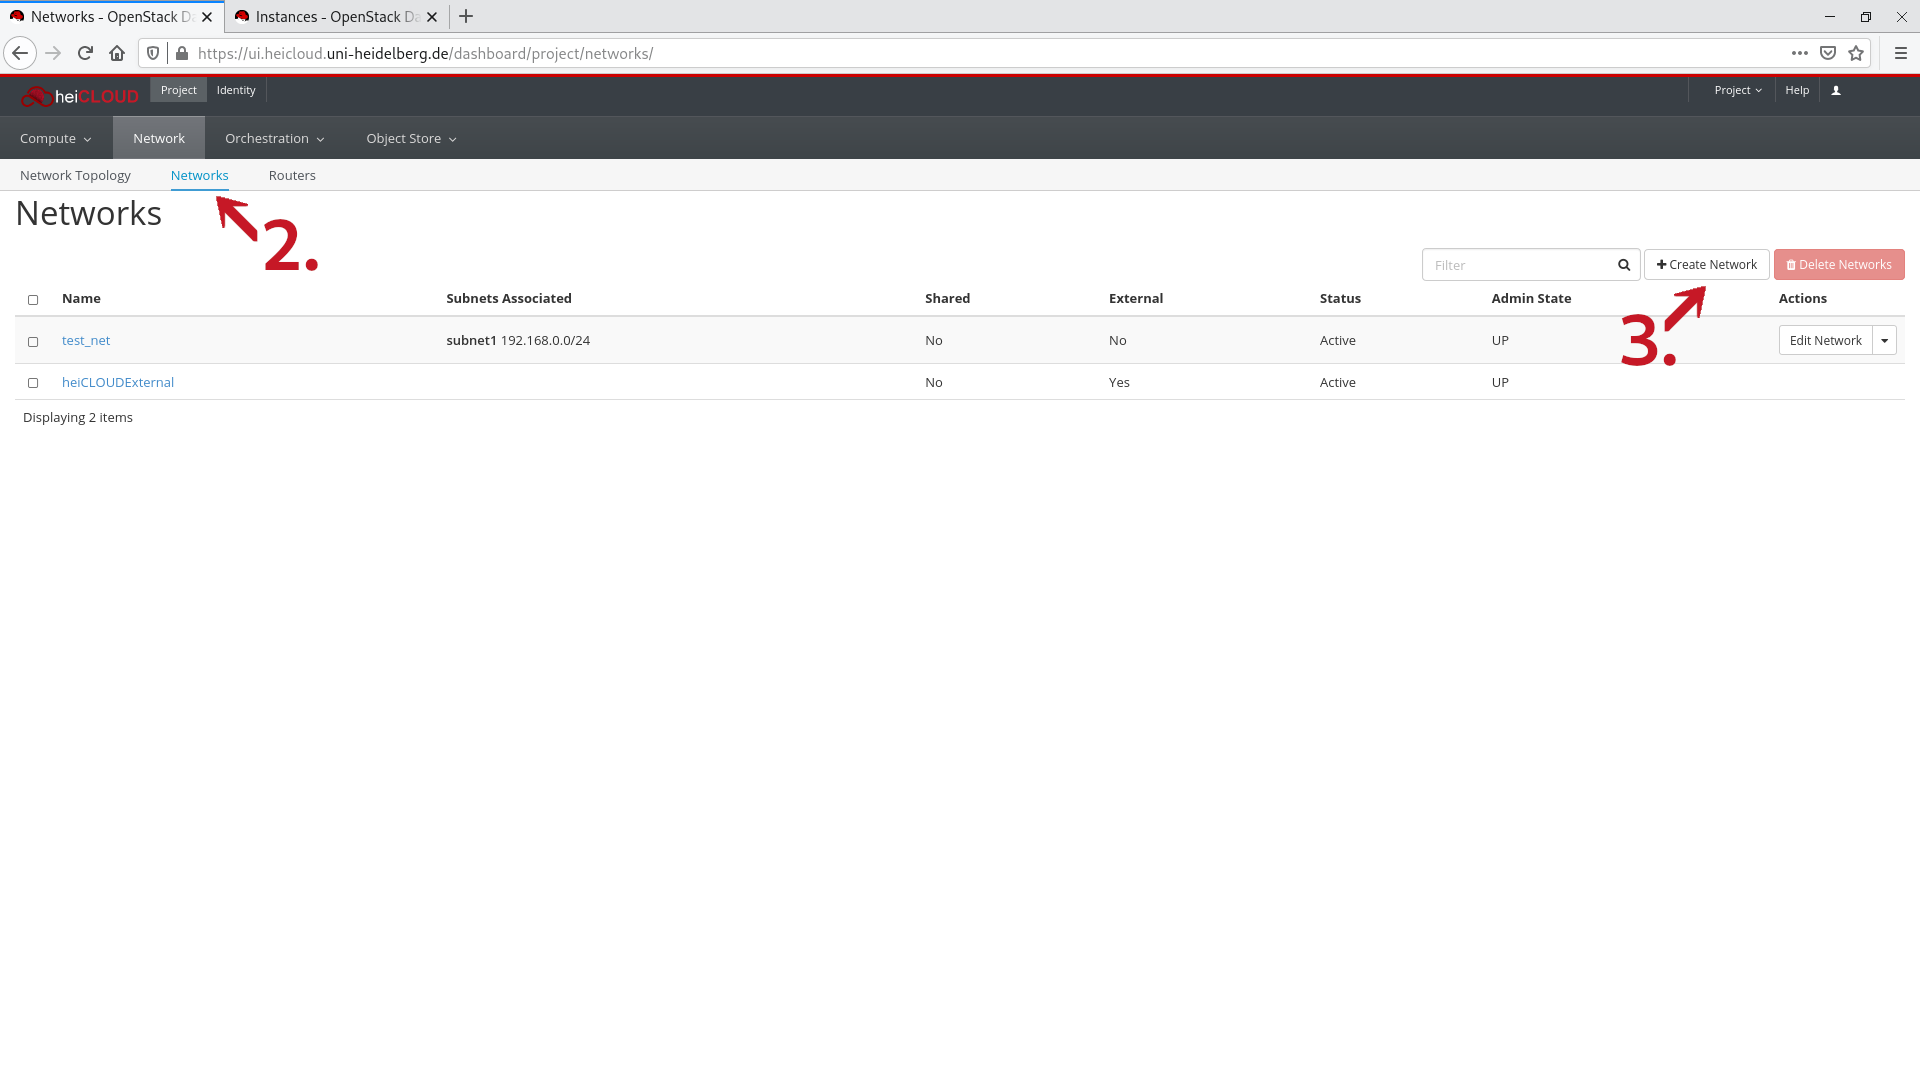
Creating a network
To use the computing resources, a network is required so that instances are addressable and can communicate. To create a network, proceed as follows:
- Log in to heiCLOUD.
- Under Project → Network, click on Networks. You will see an overview of your (existing) networks.
- In the top right, click on the Create Network button. A new window will open.
- You are in the Network tab. Enter a name for the network. Click on Next.
- You are in the Subnet tab. Again, enter a name and a network address with a subnet mask (e.g. 192.168.0.0/24). Click on Next.
- You are in the Subnet Details tab. Check the box next to Enable DHCP. Under DNS Name Servers, enter the DNS servers to be used line by line (e.g. 129.206.100.126, 129.206.210.127 for the DNS servers of Heidelberg University).
- Click on Next to create the network.
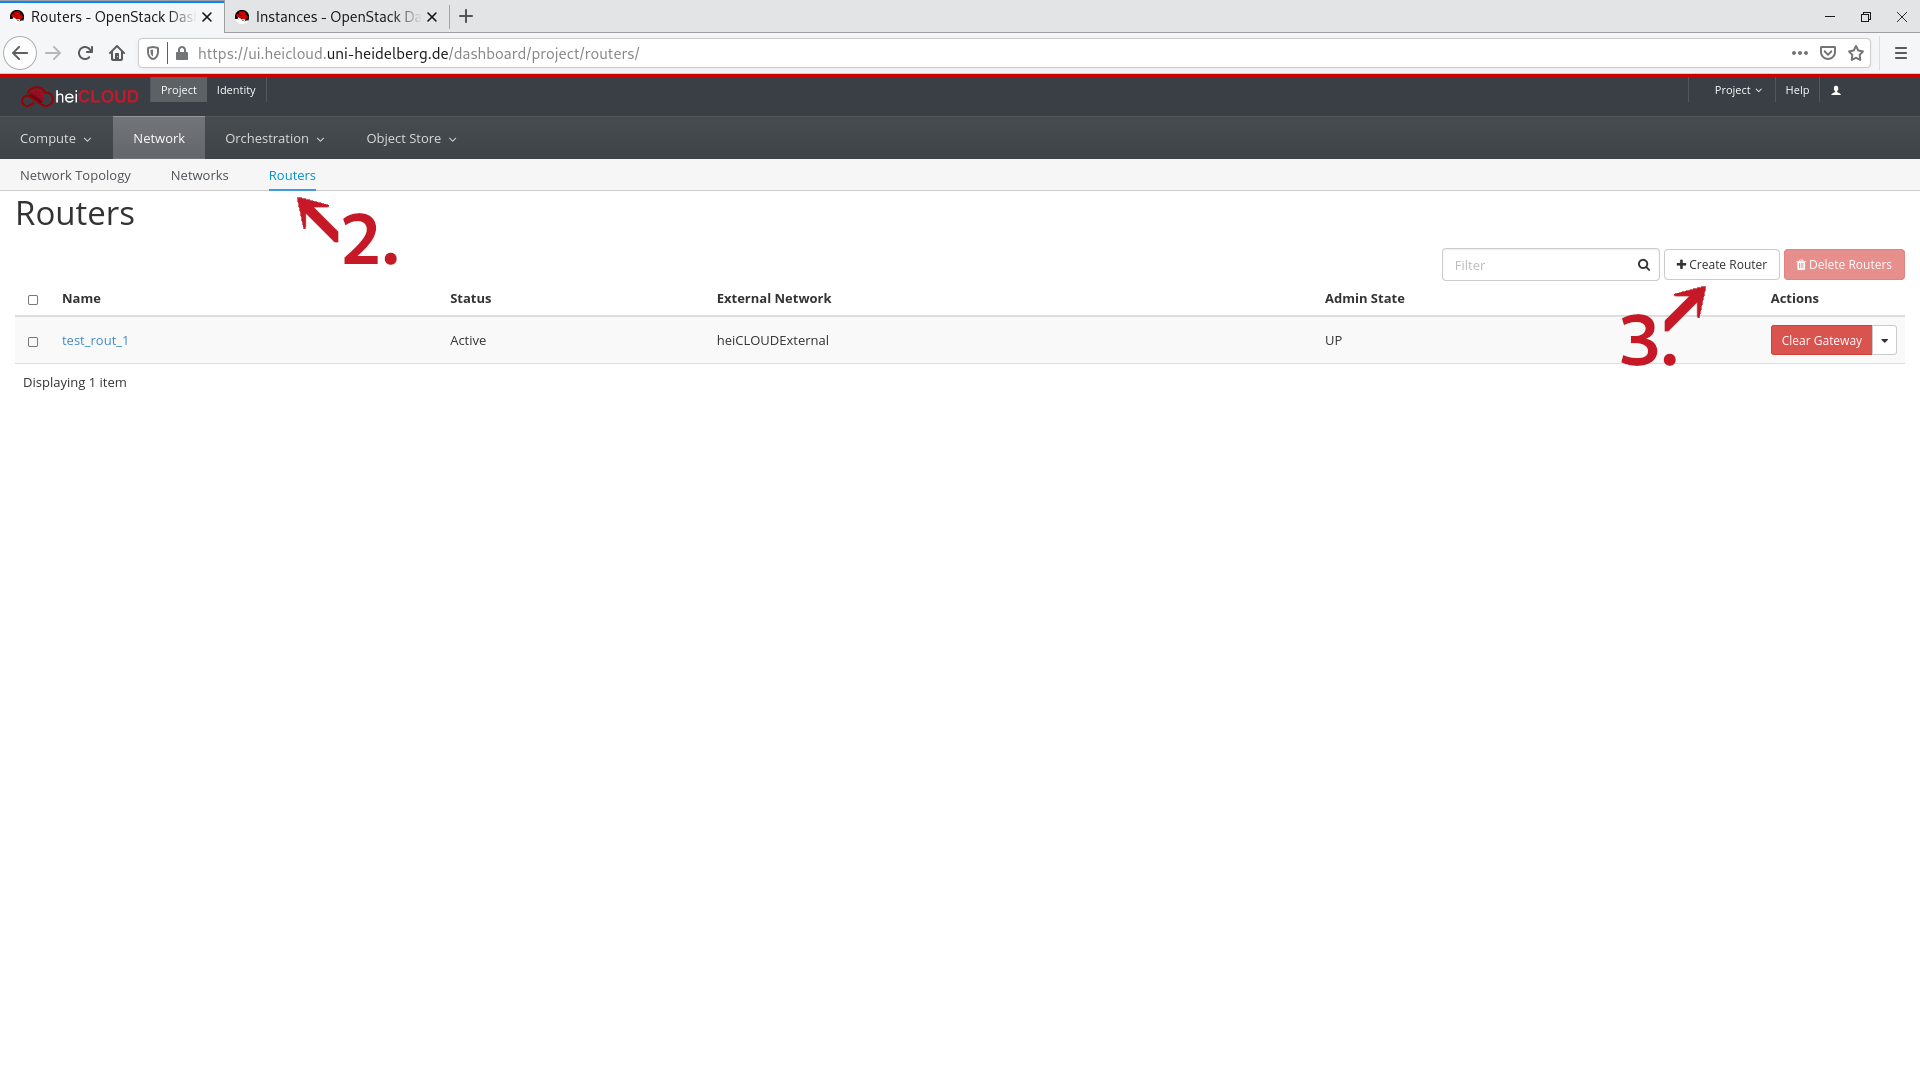
Creating a router
- Log in to heiCLOUD.
- Under Project → Network, click on Routers. You will see an overview of your (existing) routers.
- In the top right, click on the button Create Router. A new window will open.
- Enter a name for the router and, in the dropdown menu under External Network, select heiCLOUDExternal. Click on Create Router.
- Again, you will see an overview of your (existing) routers including the one just created. Click on its name.
- You will see an overview of the router details. Click on the Interfaces tab.
- You will see an overview of the (existing) router interfaces. In the top right, click on the Add Interface button. A new window will open.
- In the Subnet drop-down menu, select the subnet for which you want to add an interface. Click on the Submit button to complete the process.
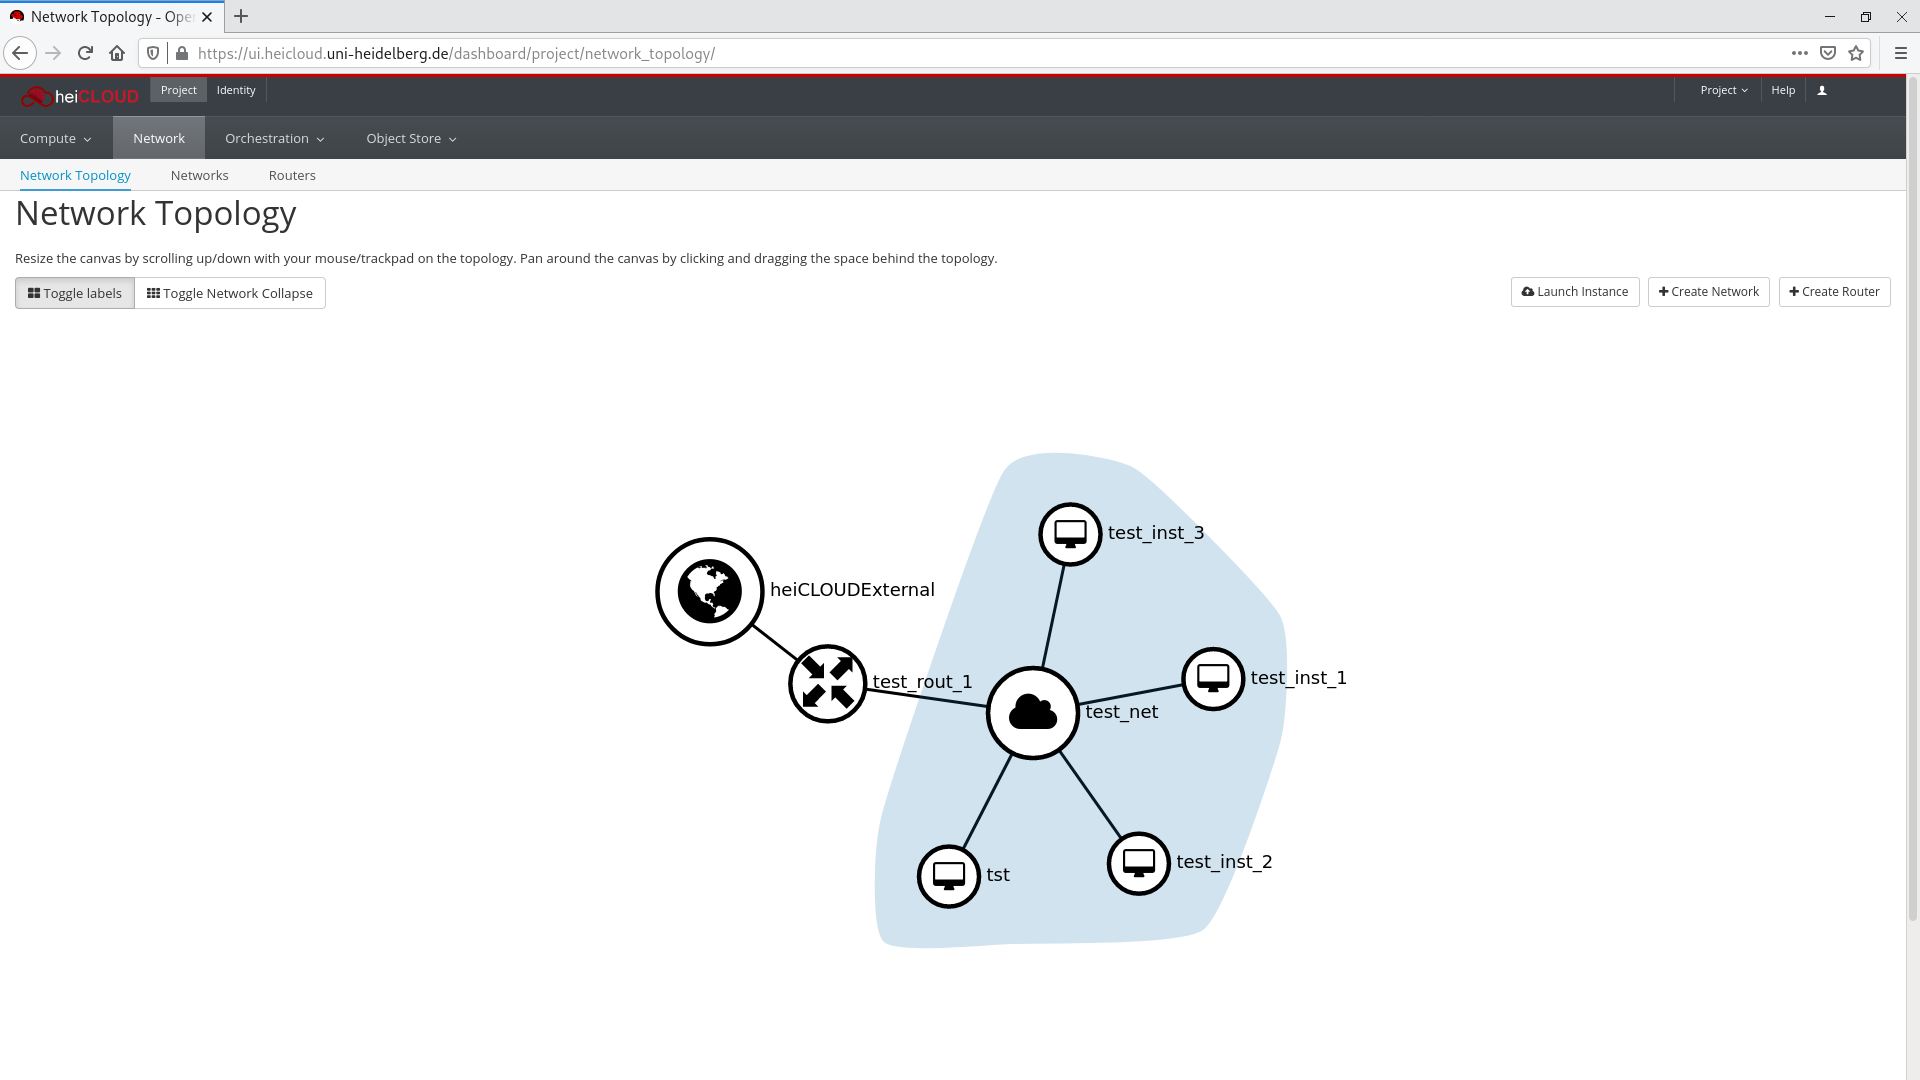
Network topology
The Network Topology tab offers a graphic representation of your network.
In the image to the right, for example, you can see how a simple topology could look: a subnet called test_net (blue cloud) with four virtual machines (tst and test_inst_[1-3]) in the same subnet, which is connected to the external network (globe) via a router (test_rout).
In this example, each instance test_inst_[1-3] was allocated a floating IP (not pictured). These are thus accessible from the outside (provided that certain security rules are in place). No floating IP was allocated to the instance tst. Therefore, the VM is not visible from outside, and connections must be initiated by the instance itself. Of course, communication and access within the subnet remains possible for all instances.